Aluma T-75XHD tower install:
The tower finally came in, and I didn’t waste any time before starting to dig.
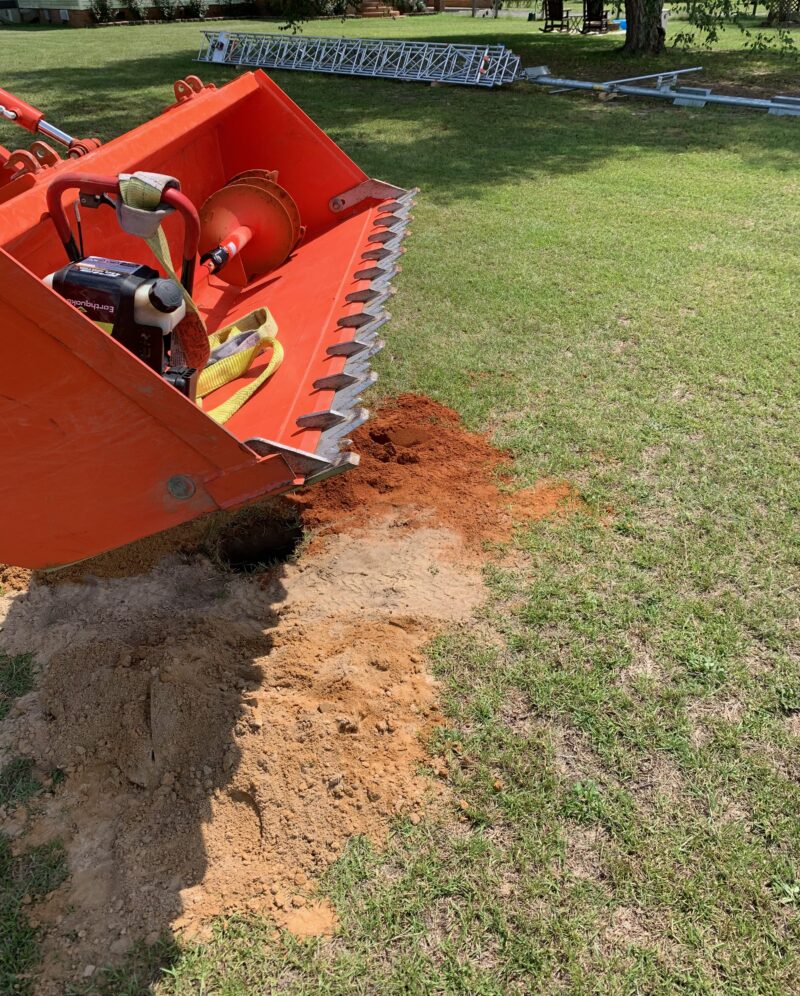
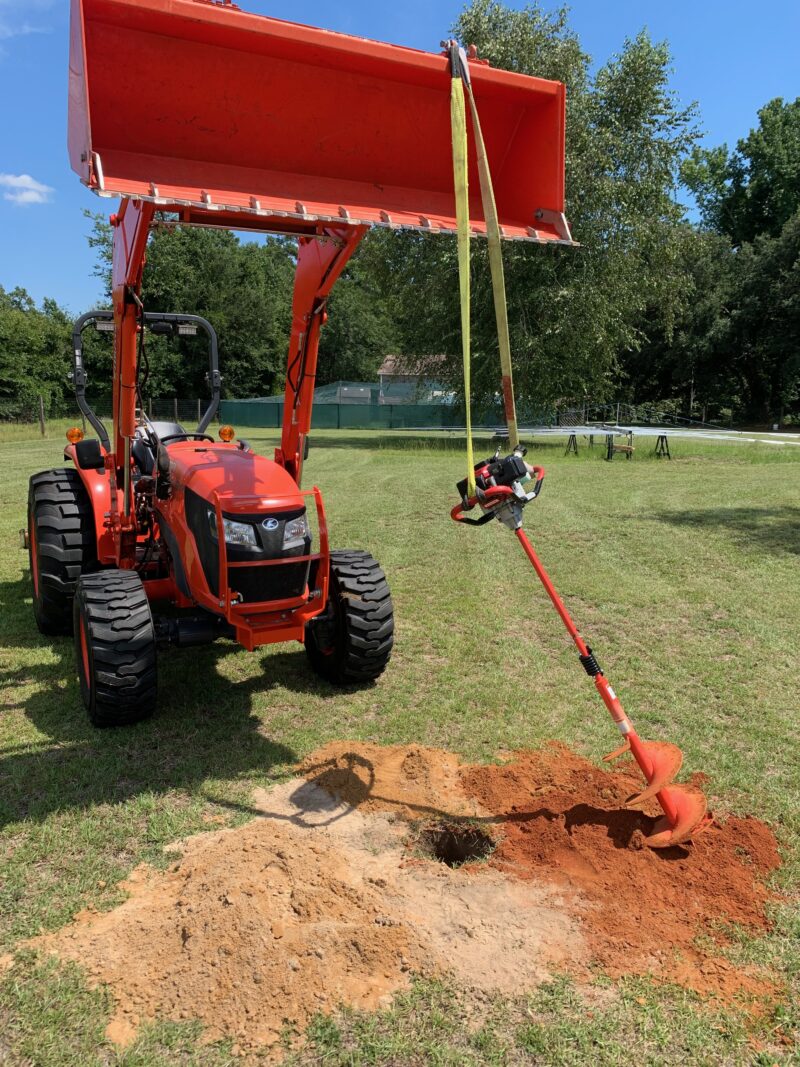
The 6″ hole was dug using a 1 ft bit with two extensions. It got heavy after a while, so used the tractor to lift it up after the bit filled up.
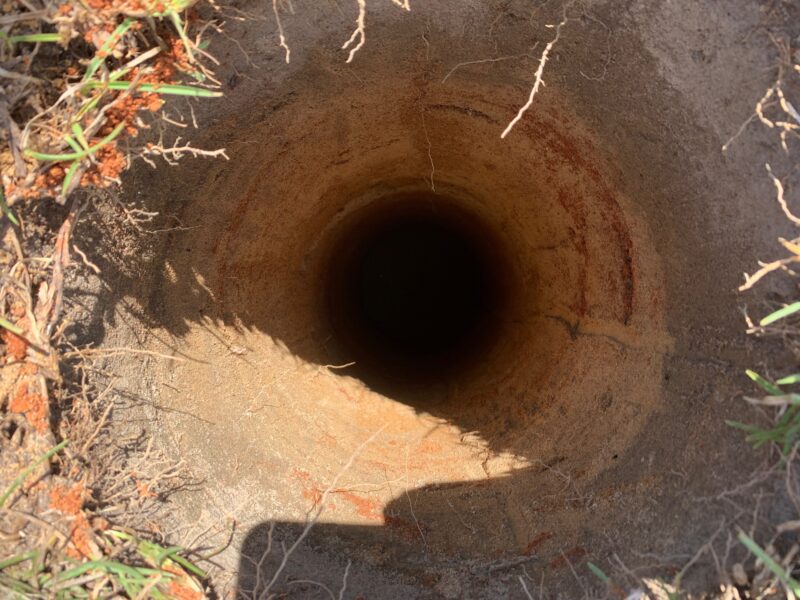
Nice and smooth all the way down.
Again, used the tractor to lift the massive MP2 pole into the hole, and proceeded to level it up.
Nice and level.
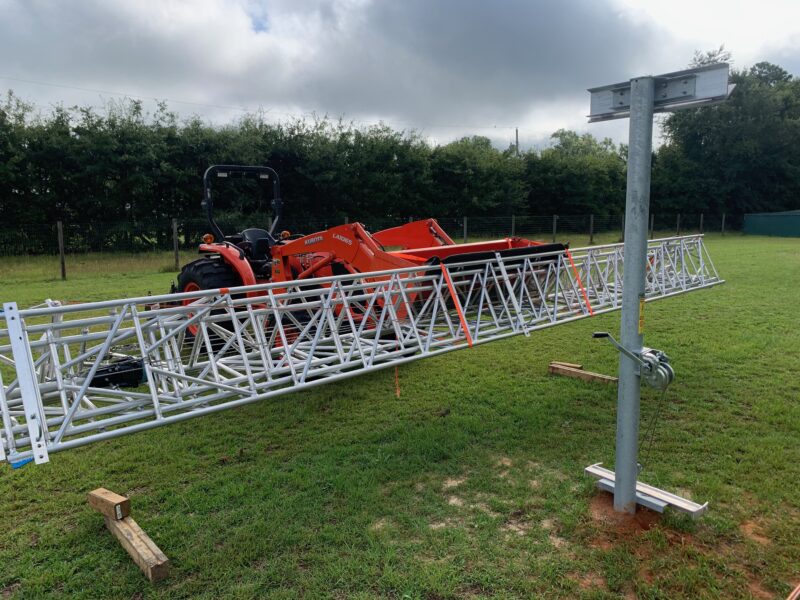
A couple of weeks later, and the pole is set completely back-filled and hard-packed all the way up to the surface.Tower carefully strapped underneath the bucket using plenty of wood for support. Yaesu 1000 DXA rotator and mast already installed.
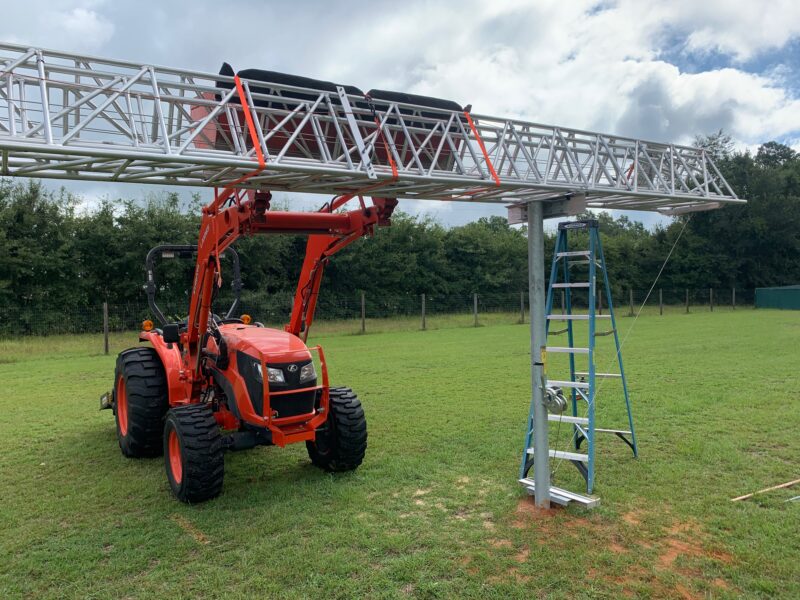
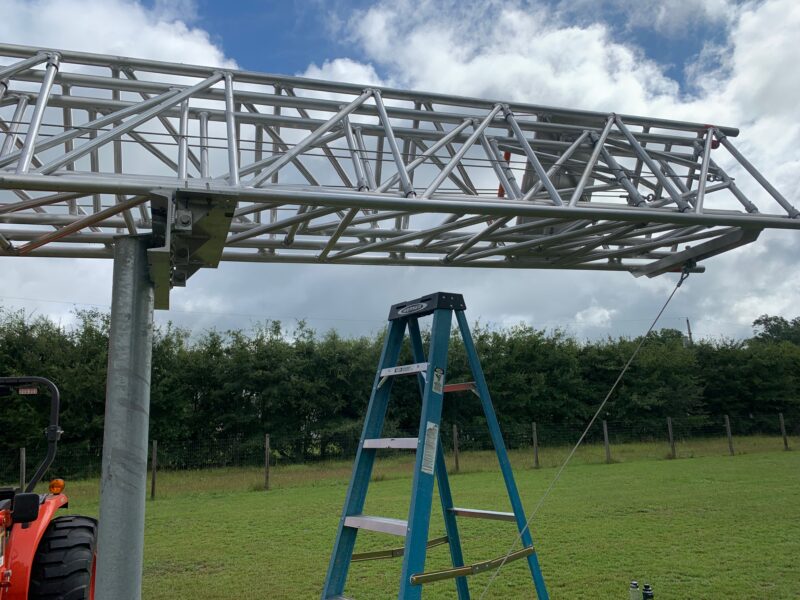
Beautiful…
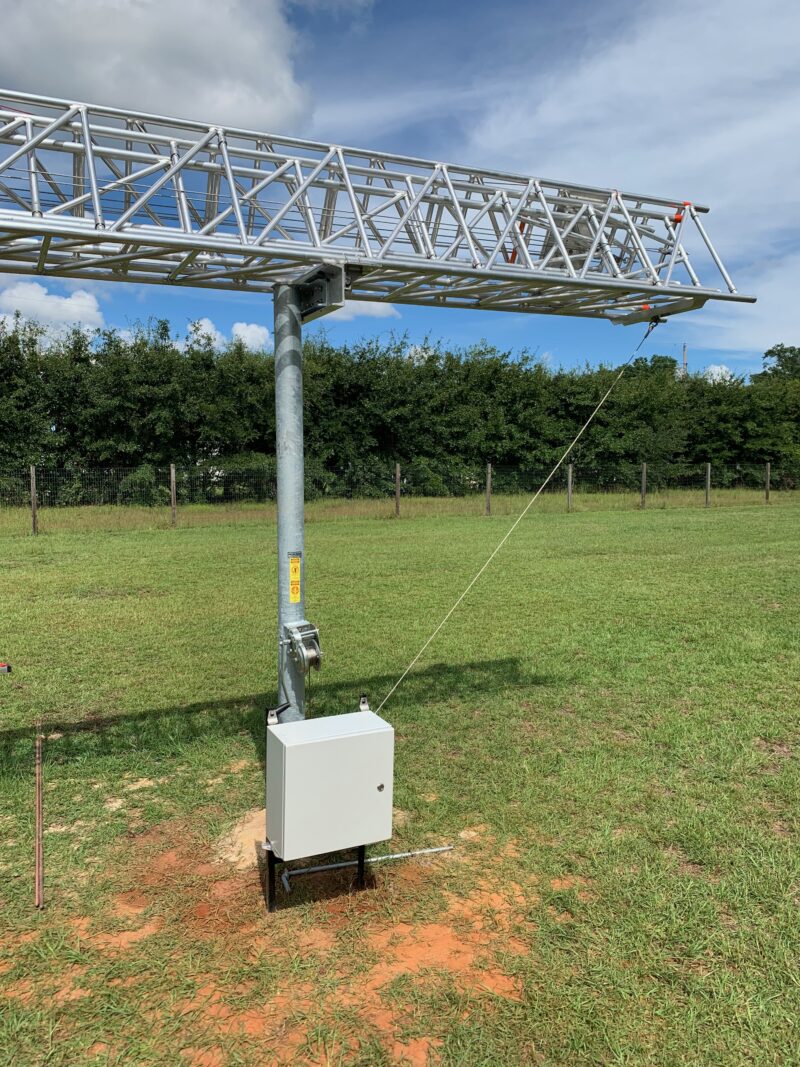
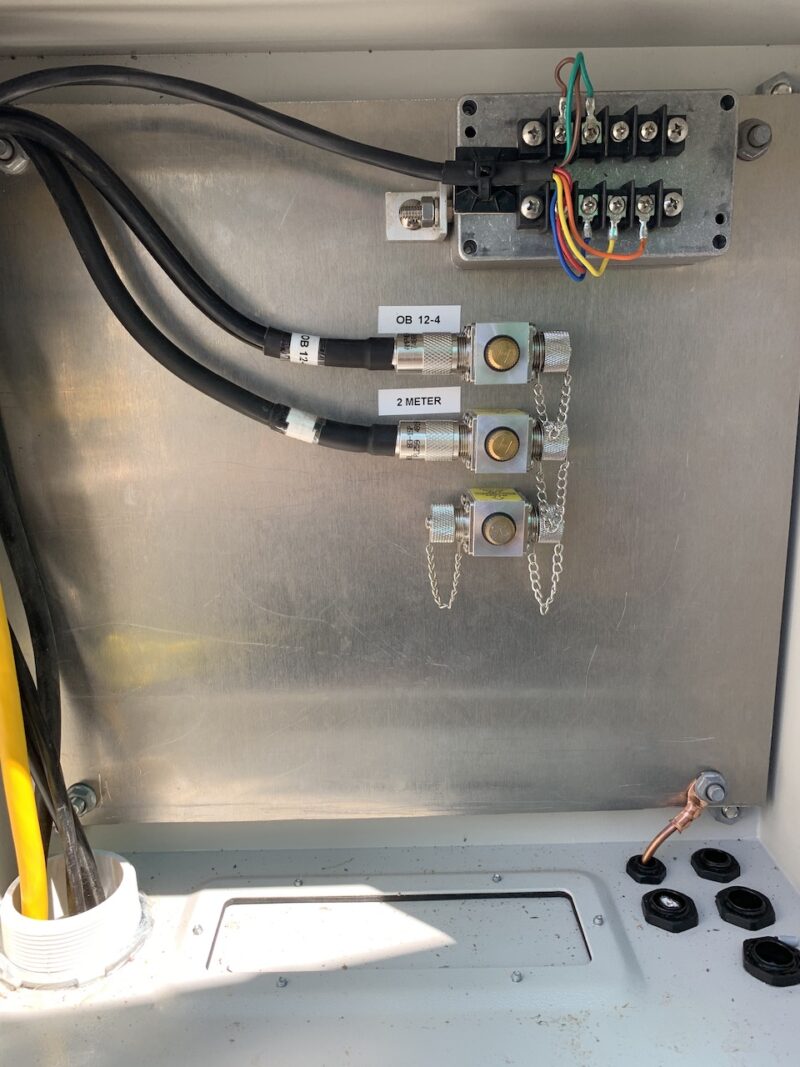
Cabinet in place, containing coax poly-phasers, roter control arrestor, and other equipment.
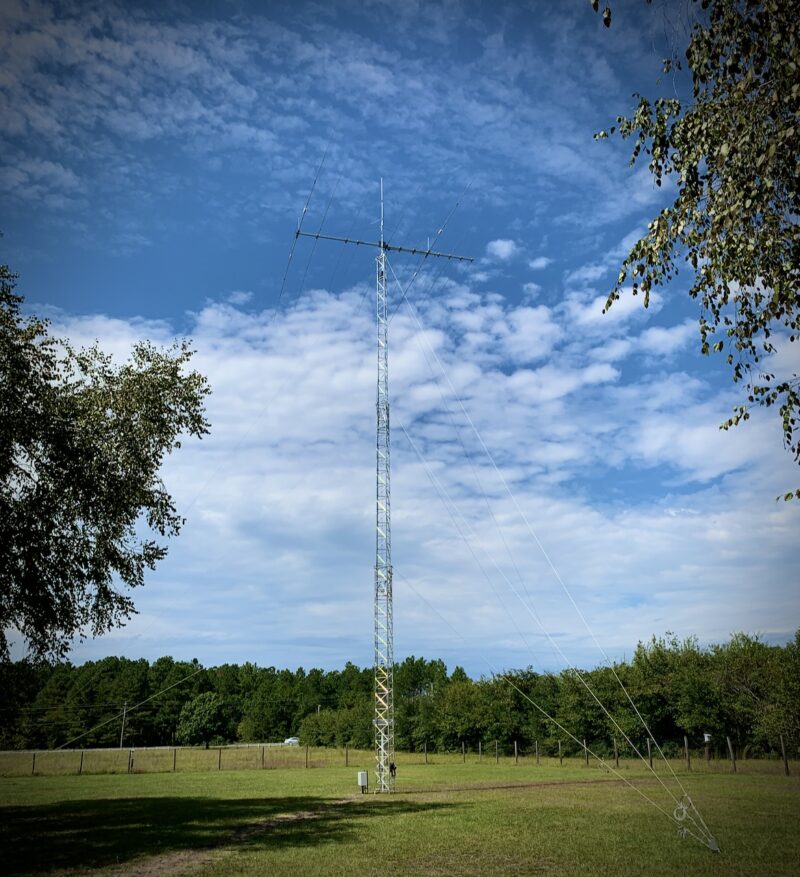
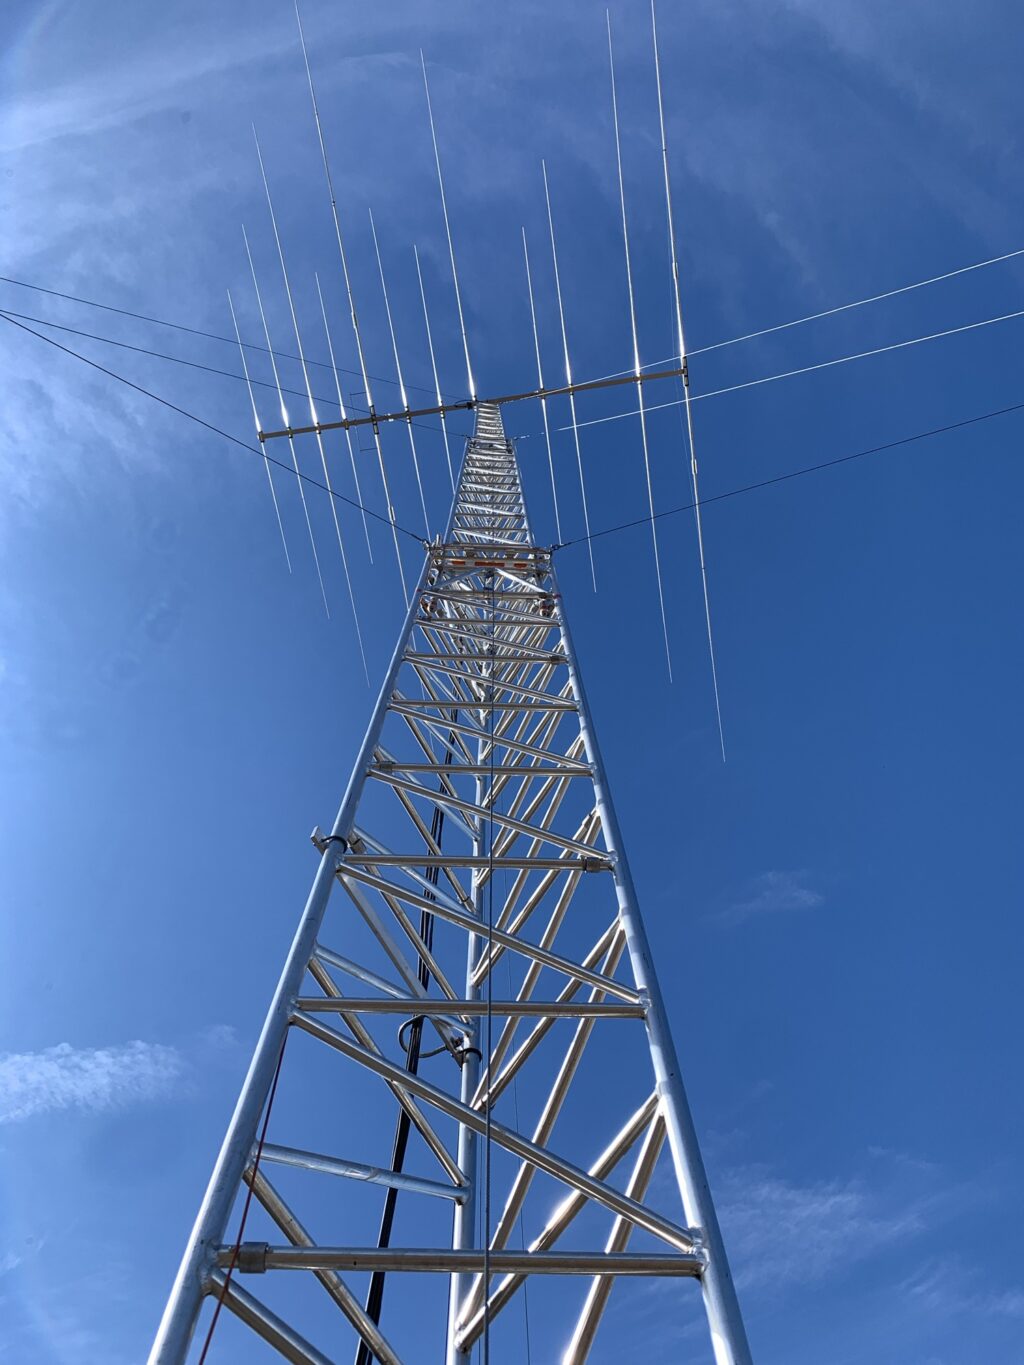
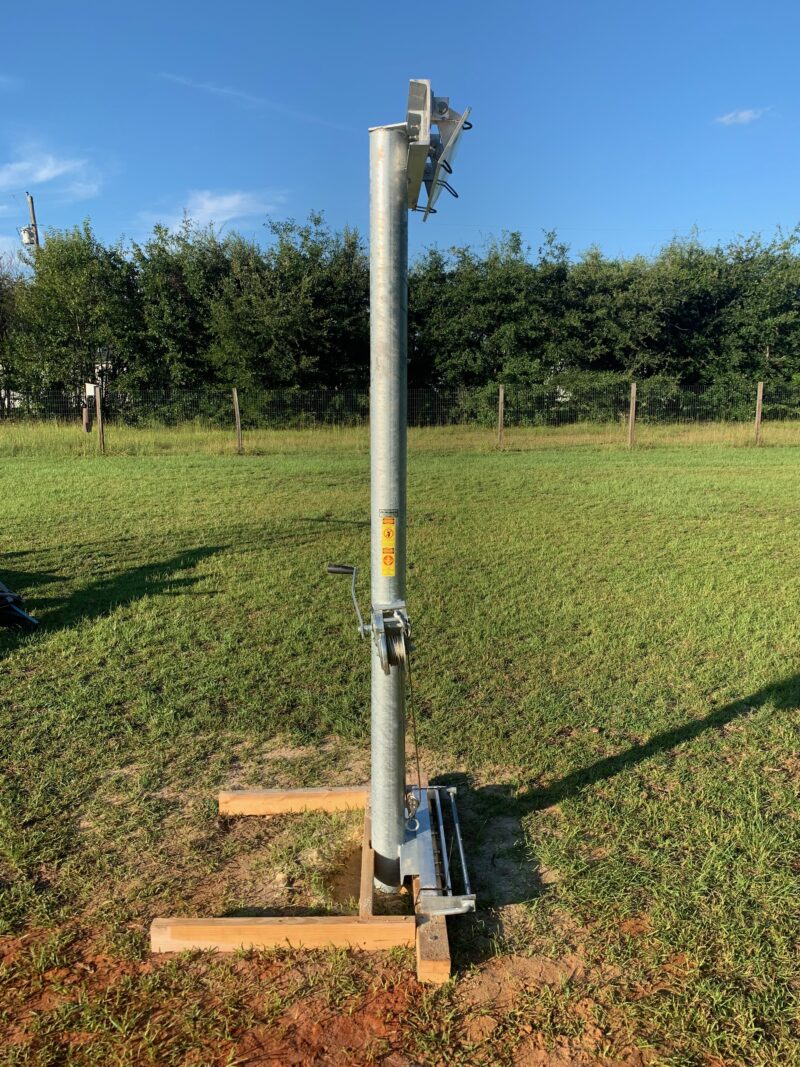
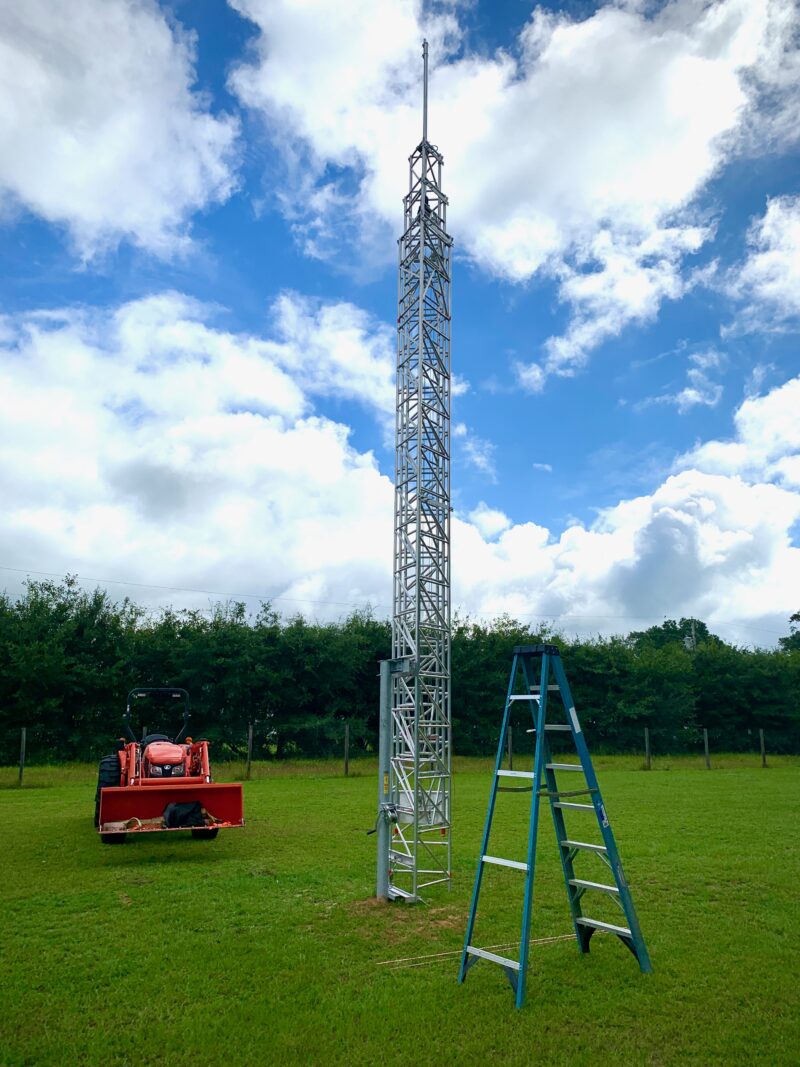
Fully extended to 70 ft.
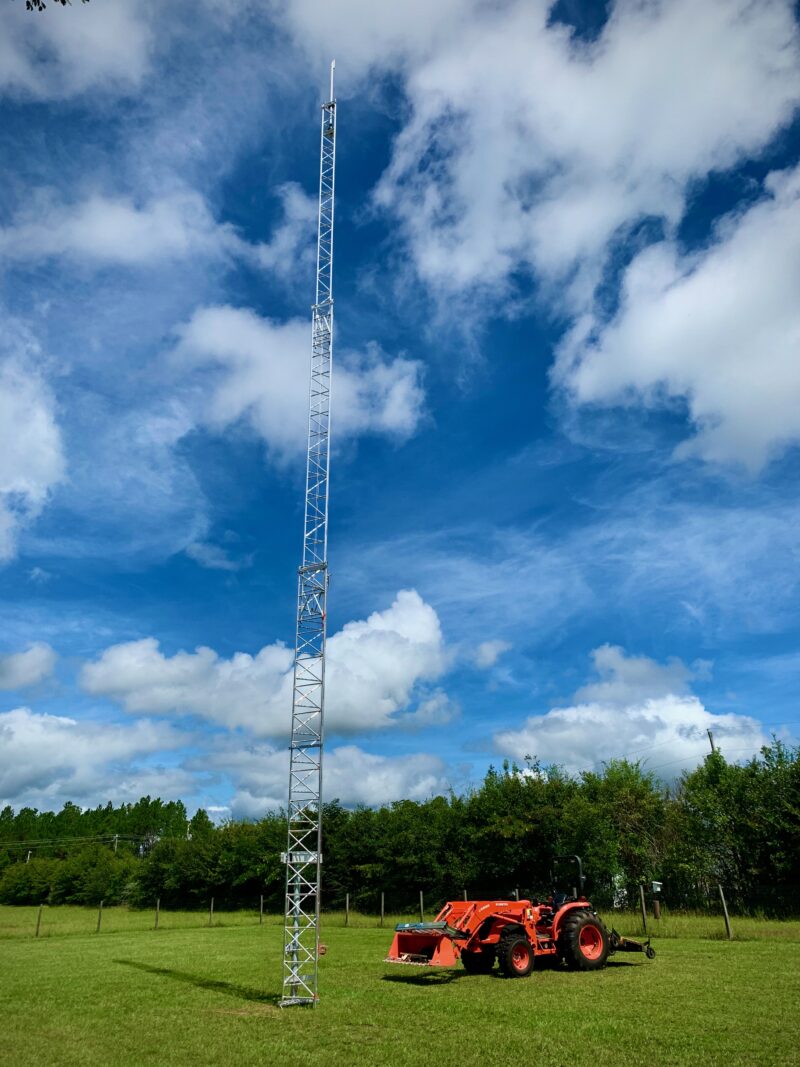
This was an easy two person job, with the help from my lovely wife. She was doing the supervising. This install was a long time coming. Now for the next stop, getting the Optibeam OB 12-4 yagi installed on top, using a crane. More to come.
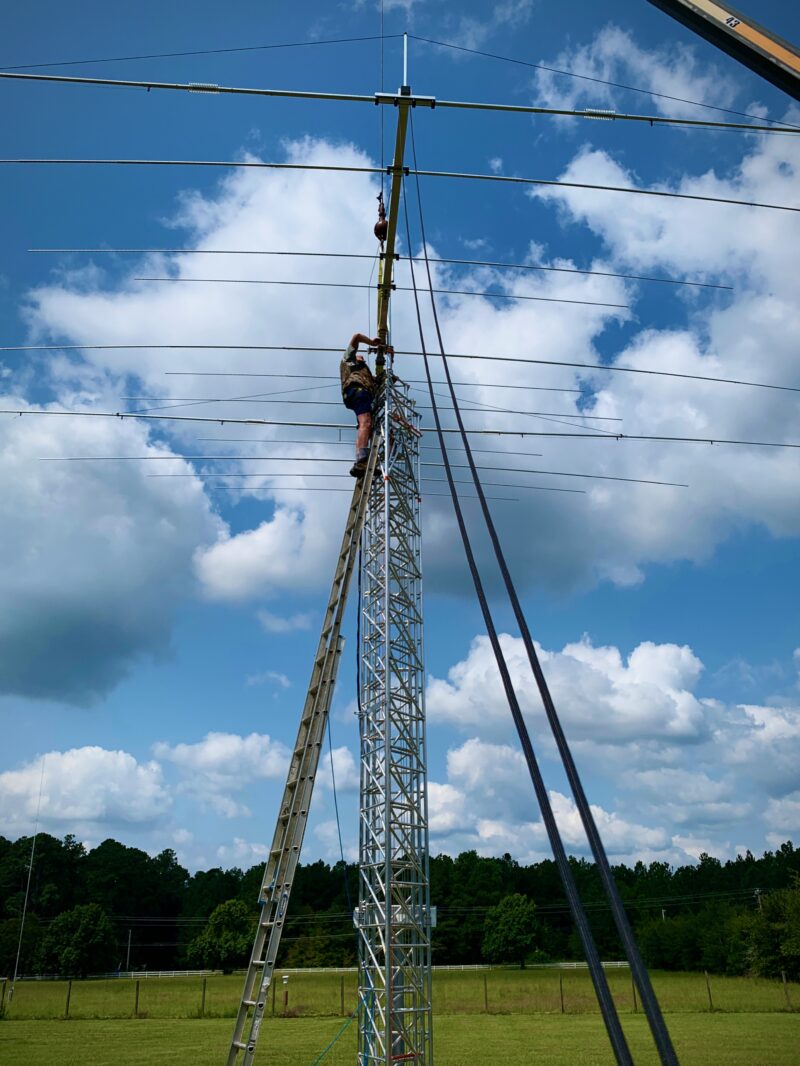
9/16/2022: Finally got the crane in to lift the Optibeam up in the air, and bolted onto the nested tower. What a beautiful sight.
Yours truly bolting the antenna to the mast plate.
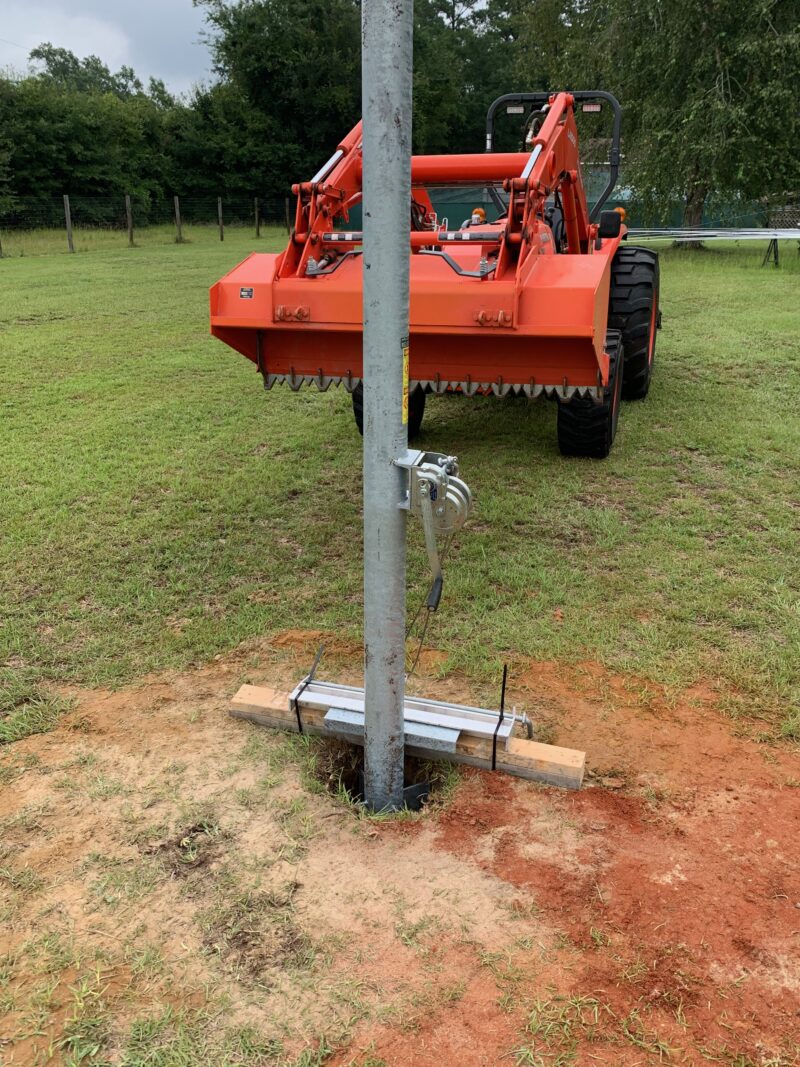
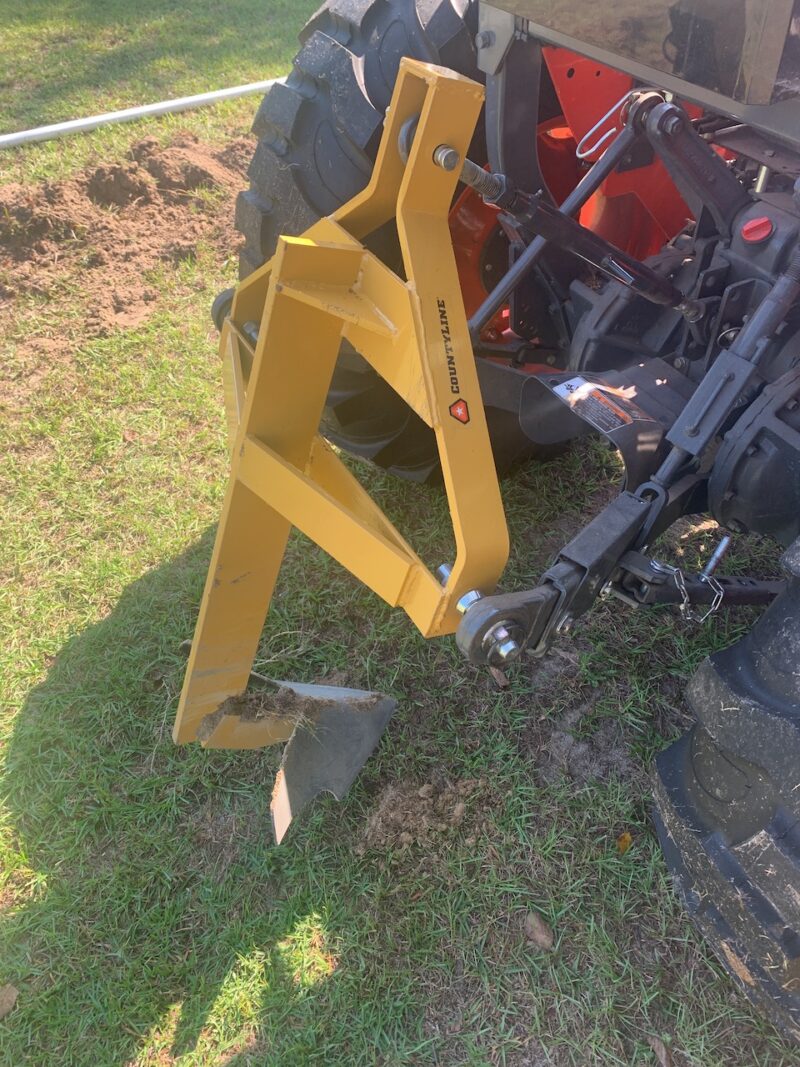
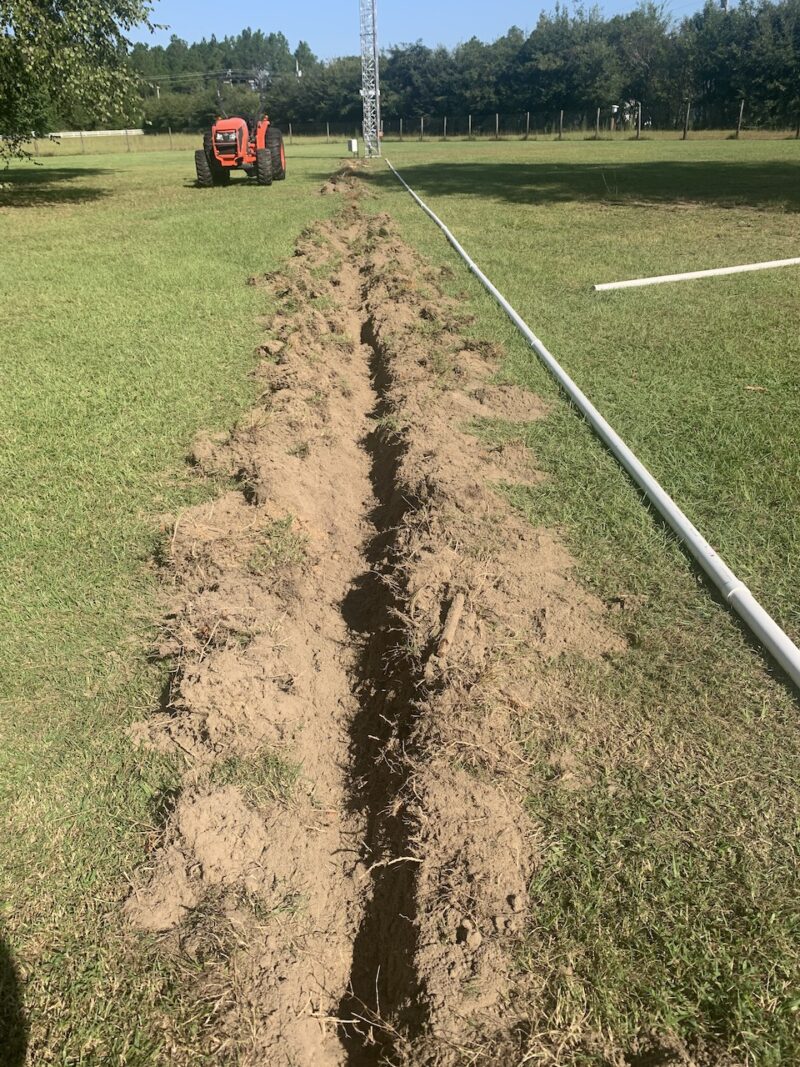
Now on to digging a trench for pvc, and pull cables.
Business end
Trenched in a few minutes, about a foot deep.
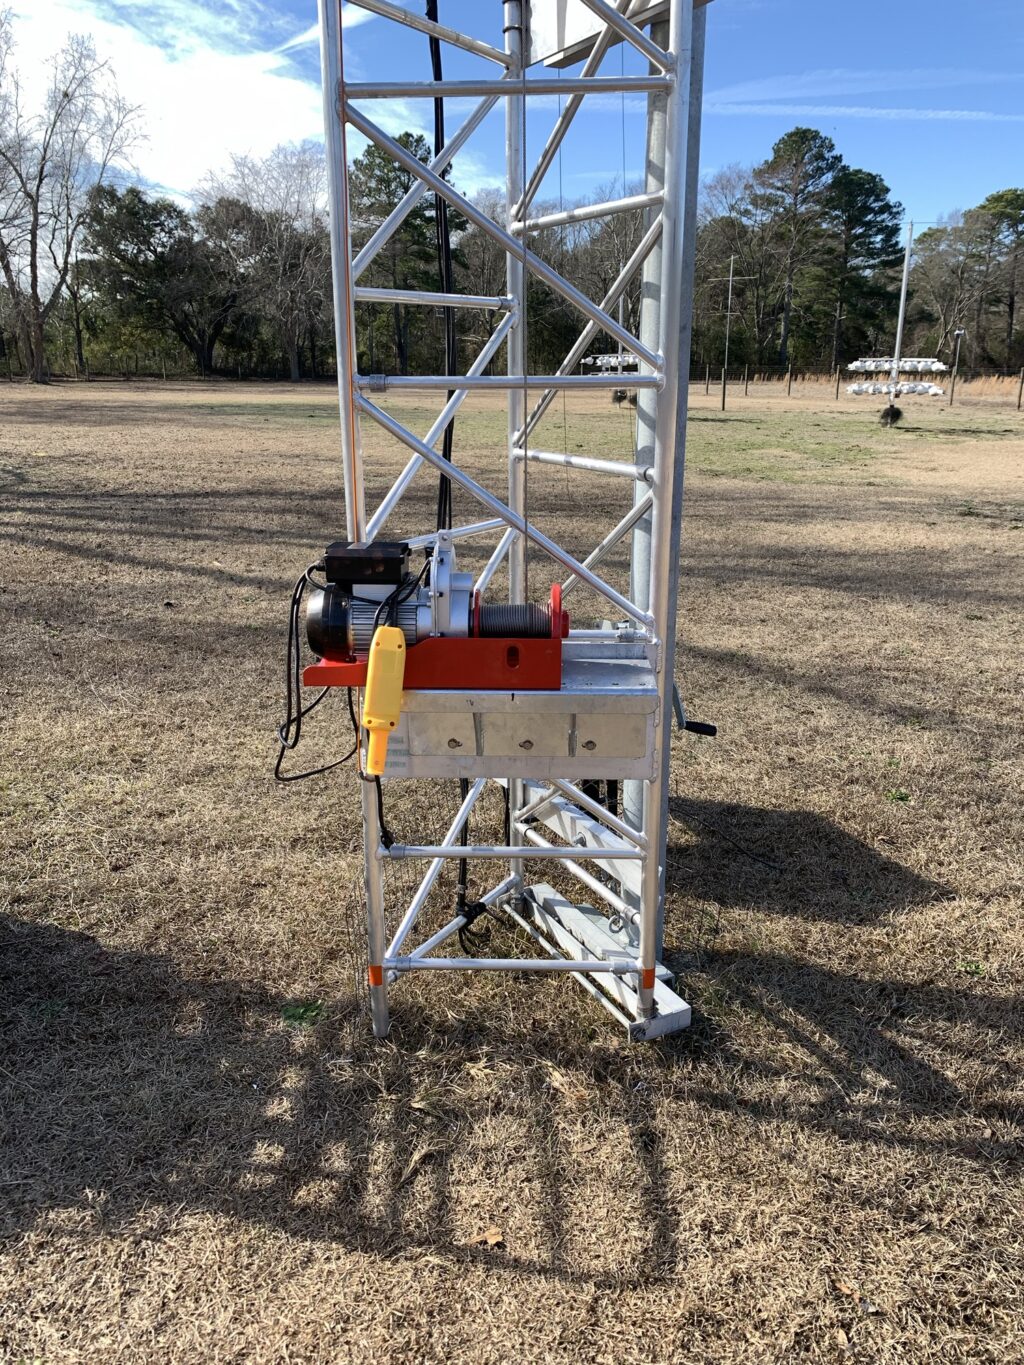
Started working in the tower cabinet. Connected up the Poly Phasers and the rotor control lightning arrester. Plenty of space in there to add a 4-position coax switch a little later. I added a 120 V feed into the cabinet to enable the use of a 120 V electric winch. Cranking this thing up using a manual worm gear winch that was supplied by Aluma, gets old pretty fast.
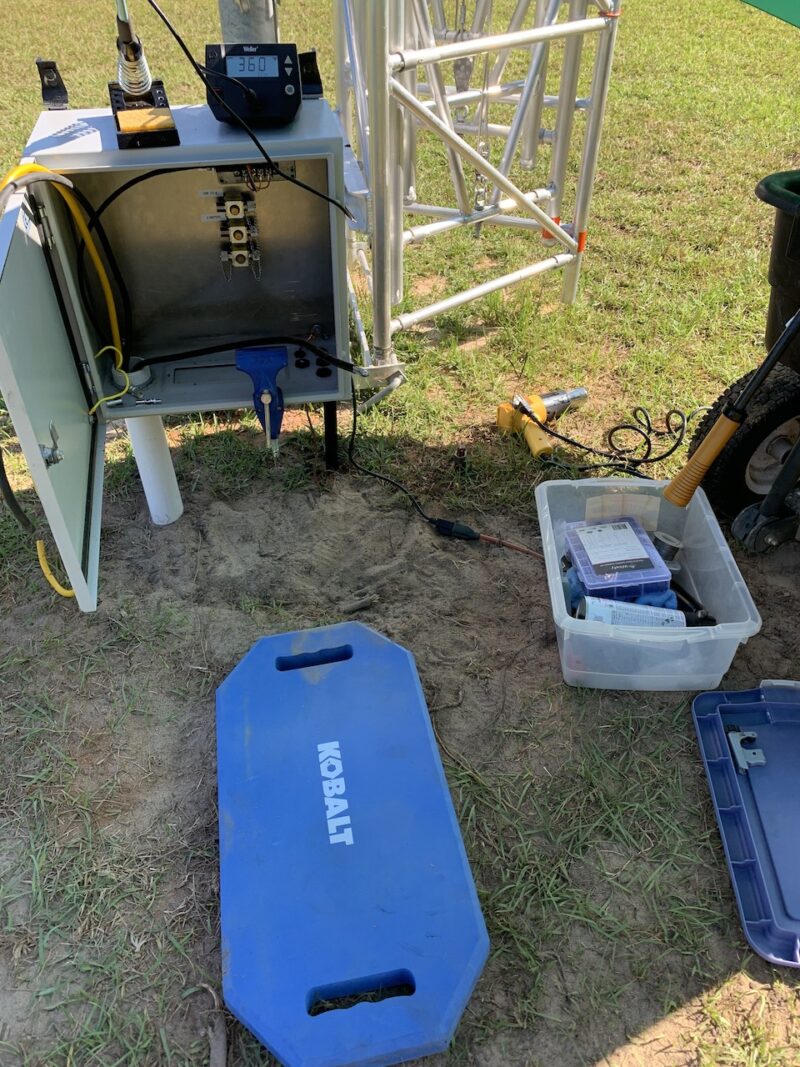
Almost done. Need a RatPak antenna switch in there.
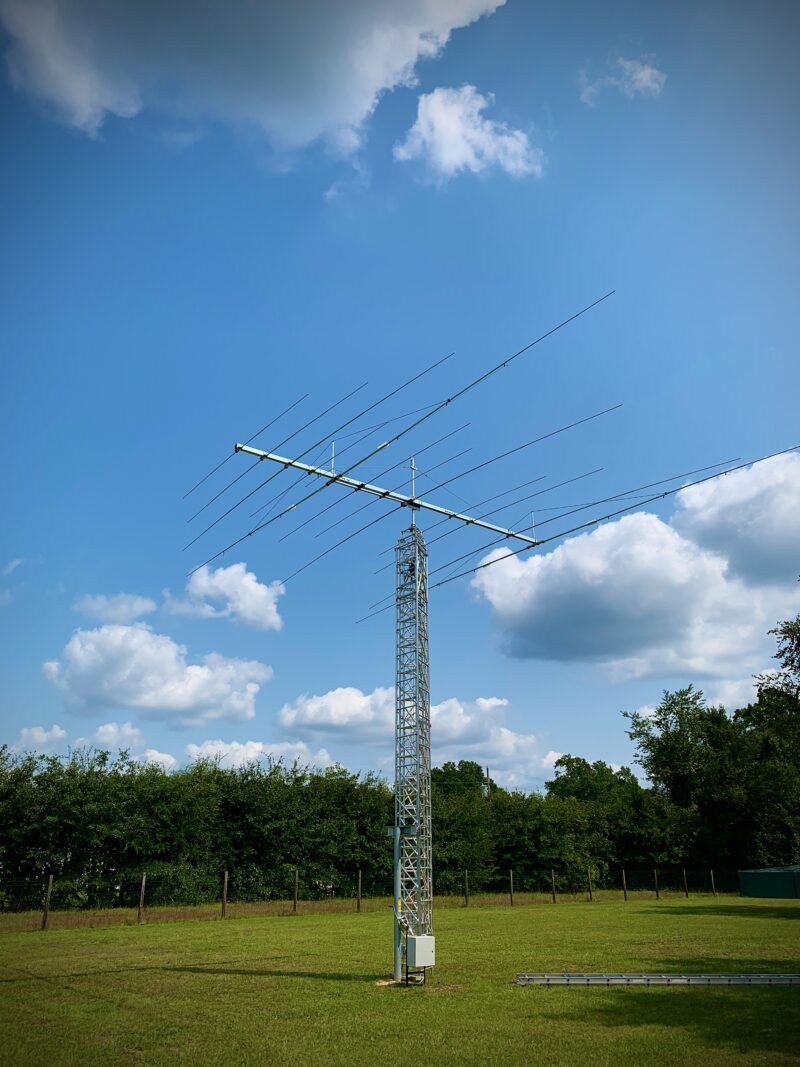
All Done….